Add a monstrously creative spin to your homeschool art plans with this fun and friendly monster art project for kids!

*This post contains referral links for recommended items; this means I could receive compensation if you take action through one of these links.*
Think all monsters are scary? Think again! In fact, it can be downright fun to combine monsters and art. That’s where today’s friendly monster art project comes into the picture.
Friendly Monster Art for Kids
Here are the supplies you’ll need to enjoy this fun monster art project with your kids.
Monster Art Supply List
- 8 x 10 canvas
- Acrylic craft paint
- Pencil
- Paint brushes or sponge brushes (one specifically for Mod Podge)
- Scrapbook paper (Whatever you have on hand will work, but this pack has some fun patterns.)
- Scissors
- Mod Podge
- Black art pen or Sharpie (optional)
- White gel or paint pen (optional)
- Self-adhesive googly eyes (optional)
- Monster template (optional)
 Once you gather the supplies needed for the project, you’re ready to start.
Step 1 – Paint Background
To begin, choose a few sheets of the scrapbook paper to use for the monster. Then paint the canvas with an acrylic paint color that complements your chosen scrapbook paper sheets.
Be sure to see if touch-ups or an extra coat of paint is needed before moving on to the next step.
Step 2 – Prepare Cutouts
While the paint dries, grab a pencil, scissors, and the sheets of scrapbook paper. You’ll also want to print the template if you want to use it.
If you’re using the template, use the pencil to shade the back of the printout. Then place the front side of the template on top of a sheet of scrapbook paper and trace the monster’s outline. When you finish, you will have drawn a light outline of the monster onto your scrapbook paper.
Choose a different sheet of scrapbook paper and repeat the tracing process for the monster’s horns and feet. If desired, repeat the process with a different pattern to create a circle for the eye. Next, use the scissors to cut out the monster, horns, feet, and eye. When you finish cutting, place all cutouts aside for Step 3. (Note: I decided not to use the smaller circle in the photo below; I cut it out, but chose to paint the eye instead.)

Interested in a one-of-a-kind monster design? Feel free to skip the template and draw your monster onto the back of the scrapbook paper. If desired, draw some elements on a different sheet of paper to create contrast between the body and any “monster parts” like horns, tail, arms, or legs you want to add. Then use the scissors to cut them out.
Remember, monsters aren’t limited to the usual number of arms, legs, eyes, or anything else. Don’t be afraid to create something with seven eyes and four ears or some other wacky combination.
Step 3 – Add to the Canvas
Once the cutouts are ready, decide where you want to position your monster on the canvas. When you’re happy with the placement, lightly “paint” the back of the monster’s body with Mod Podge and gently press it onto the canvas. Then repeat the process with any additional monster pieces.
(As it turns out, magnetic building tiles are great for preventing bubbles in the paper after applying Mod Podge. 😉 )
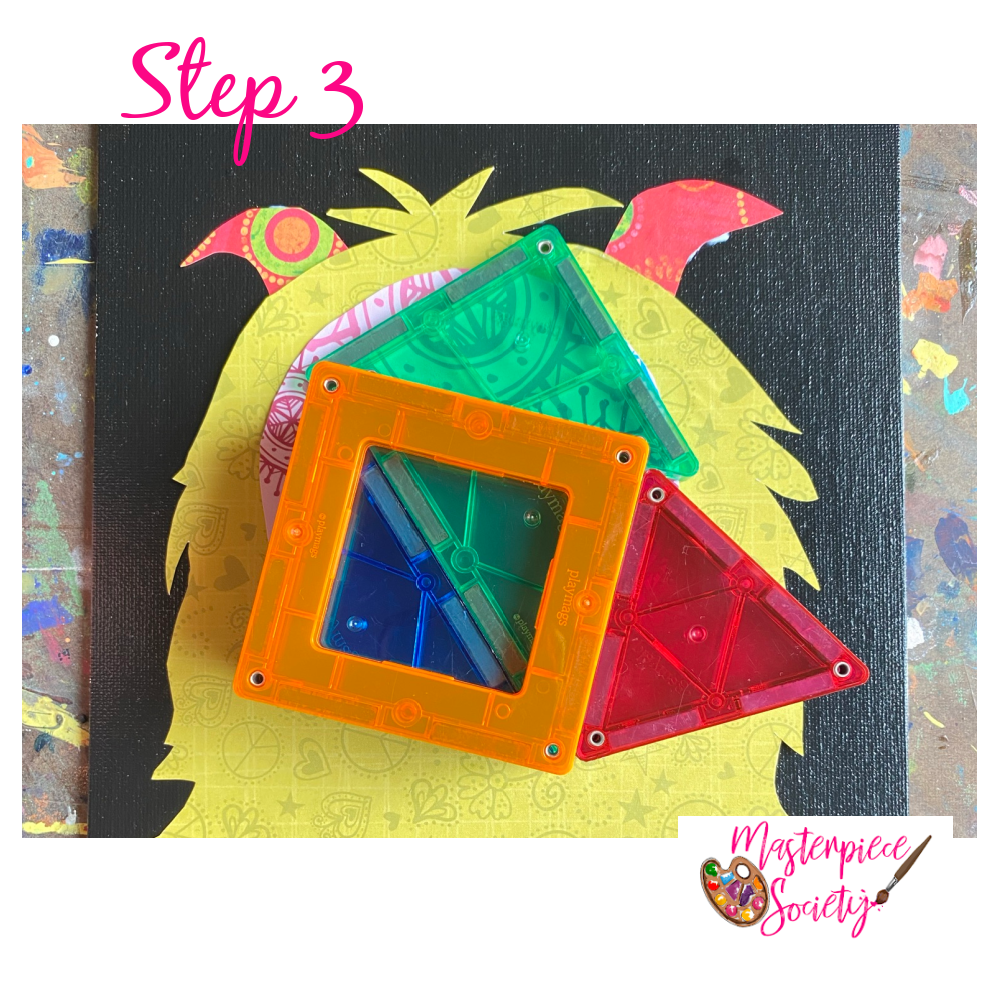 Worth noting, you can use a glue stick for this step if you want to speed up the drying process a bit. You’ll still need to allow time for drying, but you’ll be able to move on to Step 4 a little more quickly.
Step 4 – Accent and Seal
The last step of our friendly monster art is to finish out the scene with accents. This step is optional, but it’s an easy way to bring all the elements together or add some extra personality to your piece. Here are some accent ideas to consider:
- Simply paint an eye (or three 😉 ) somewhere onto the monster body. (Googly eyes can be used here instead of a painted eye, but be sure to wait until after sealing to attach them.)
- Draw accents with a Sharpie or paint pen. This is your chance to draw a mouth, scribble in some fur, color stripes on the horns, and include any other fun touches you wish to add.
 Outline your monster. I used a white paint pen since my friendly monster art features a black canvas, but a black Sharpie works well for accenting on a lighter canvas. (You can also do this step after sealing if you prefer. It takes longer to finish since extra drying time is needed, but it can make the outlining a smoother process.)
- When all painted elements are dry, seal your work by painting a layer of Mod Podge over the entire canvas.
Once everything dries, your friendly monster art is ready to display or share!
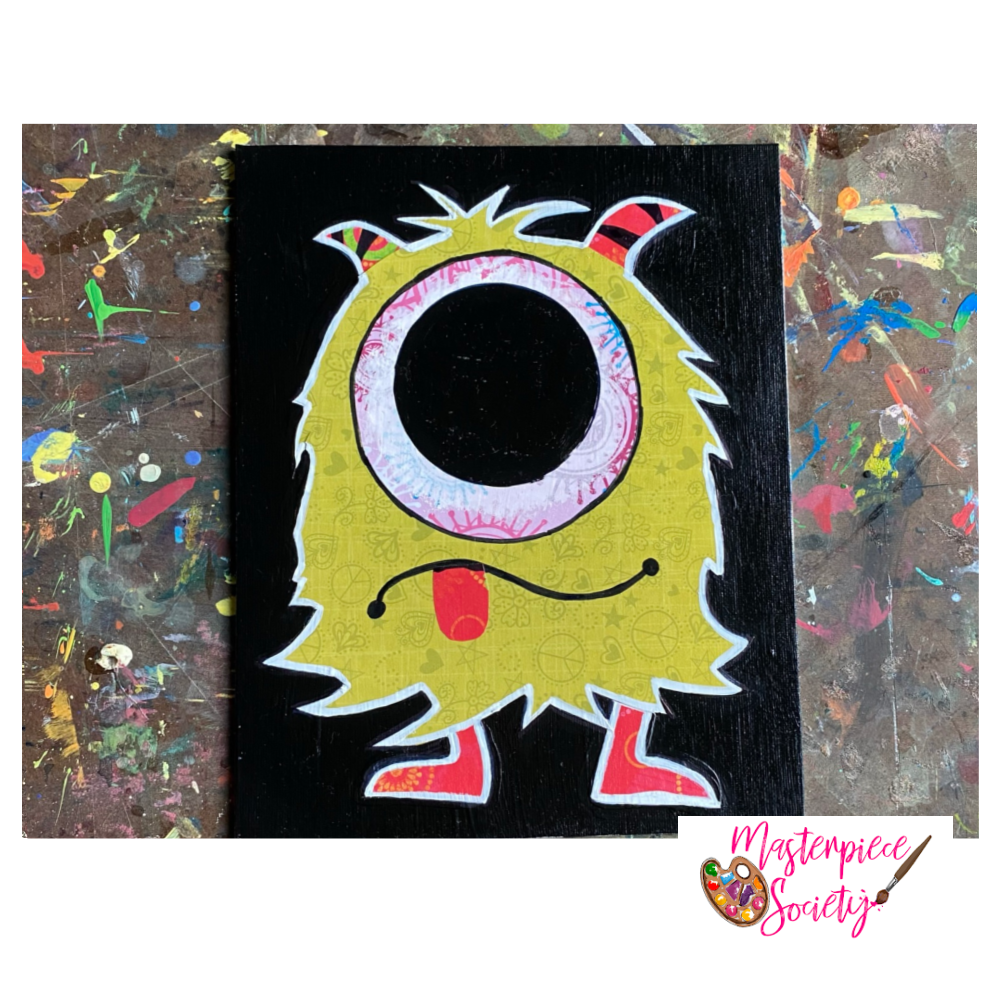 Don’t forget to share your delightful monster with us! 🙂 Be sure to share it in the Facebook group or tag us on Instagram so we can see your work.
Looking for more fall art fun to enjoy with your kids? Be sure to check out this easy fall art tutorial and our Fall Mixed Media Workshop.


