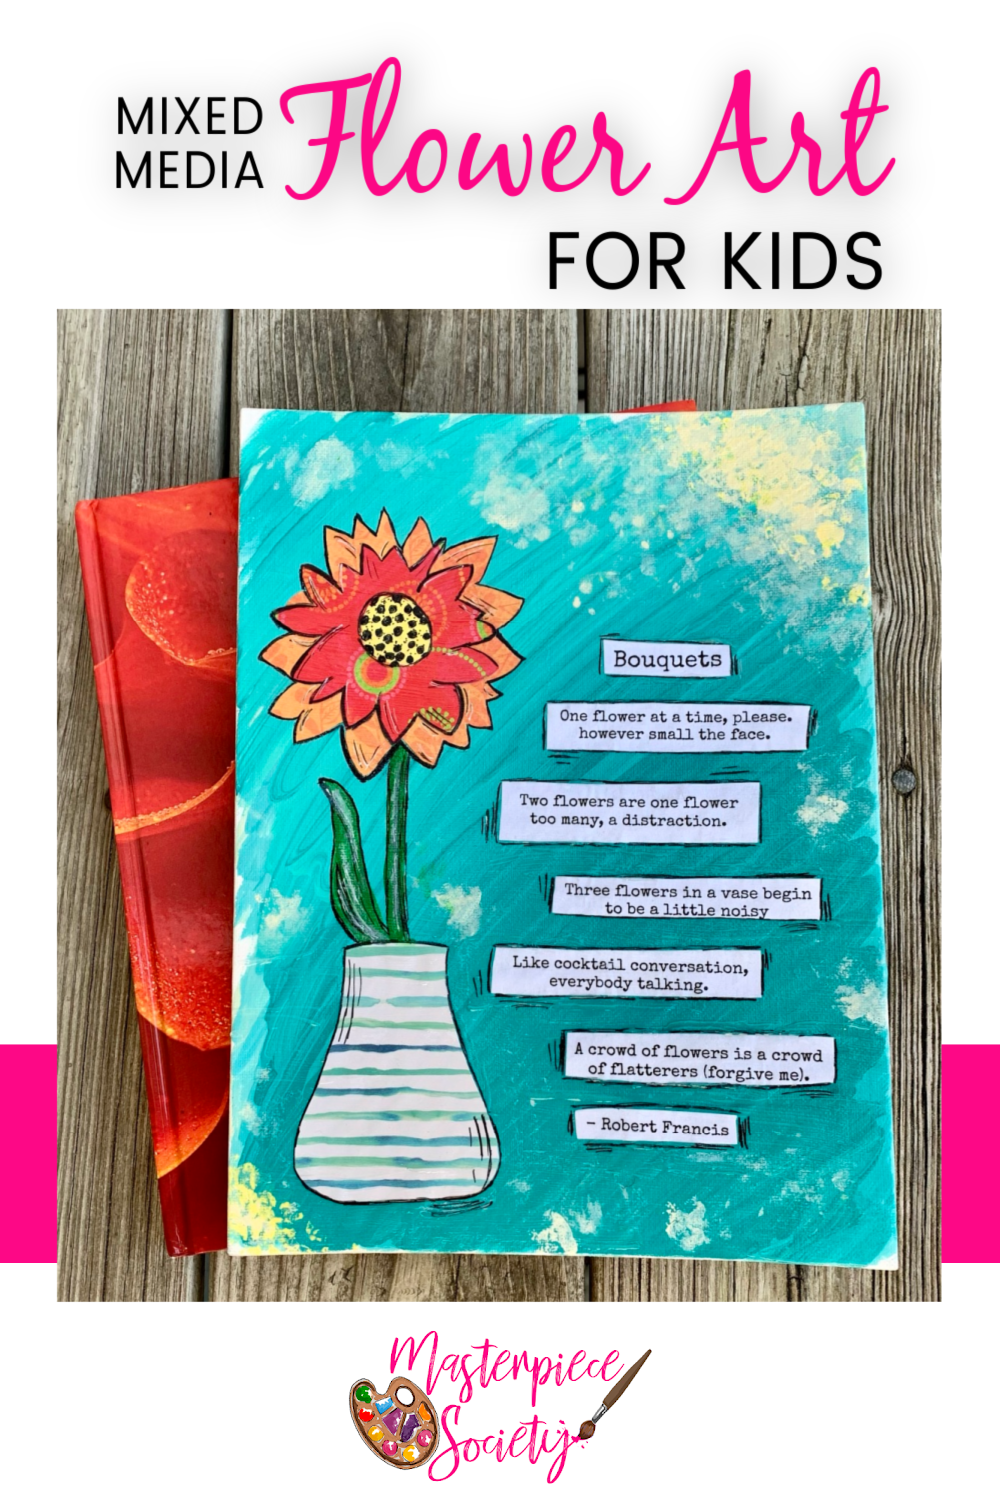
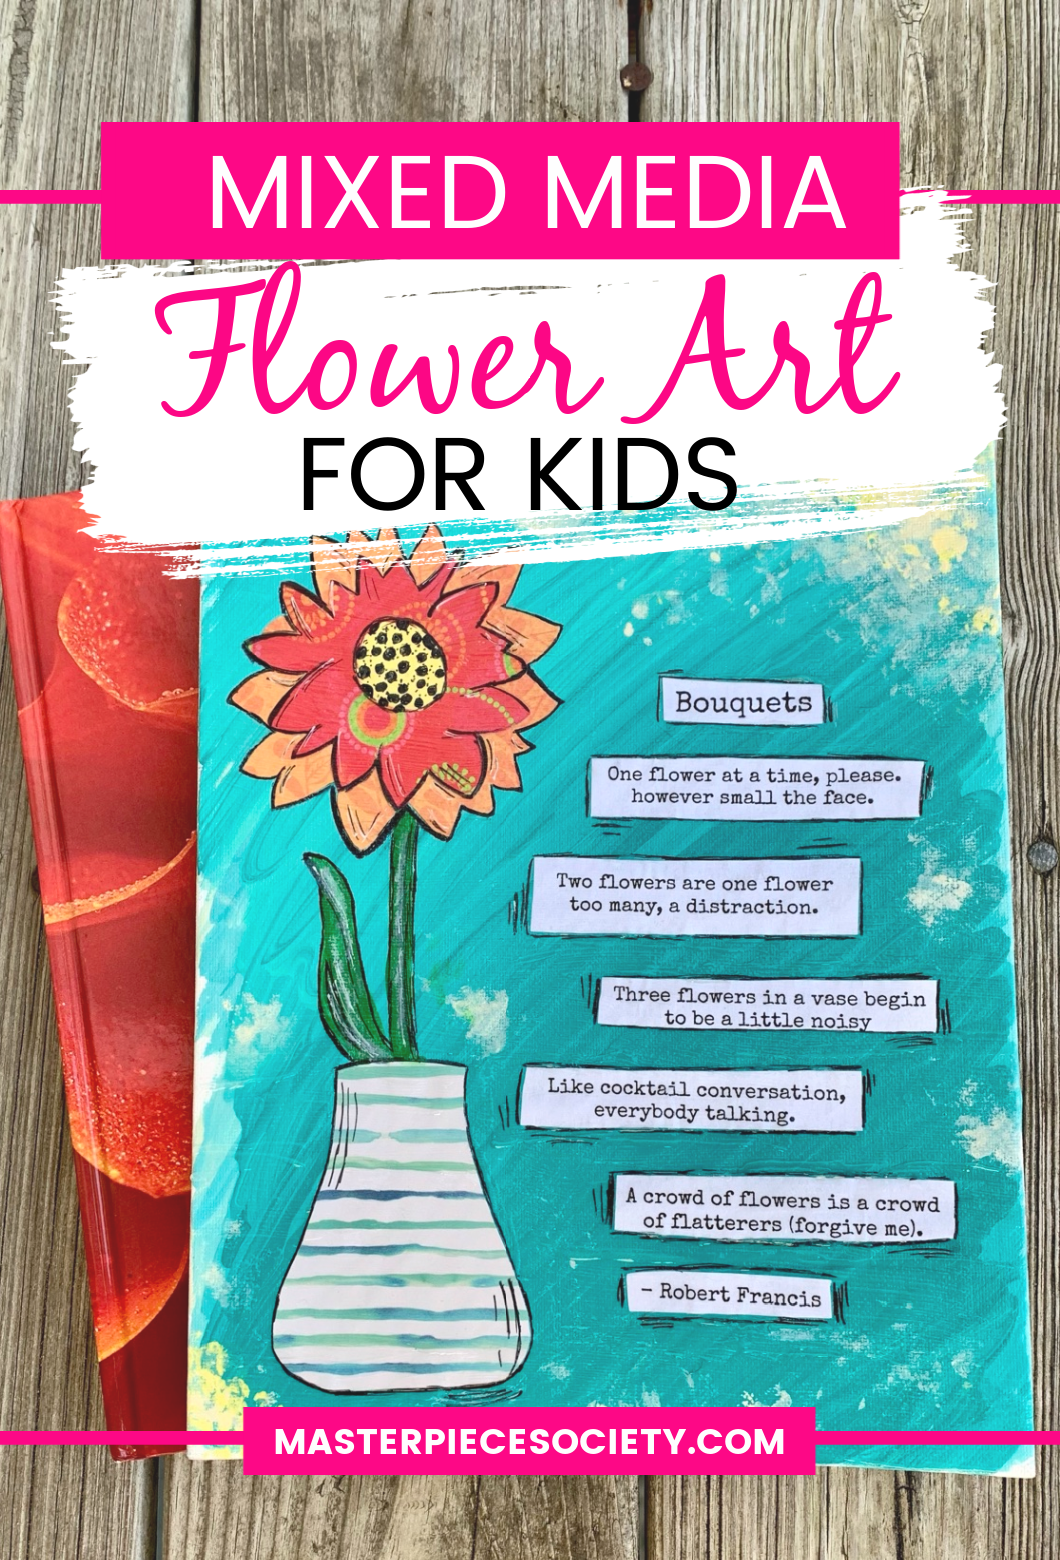
Spring is just around the corner and we’re celebrating with a fun mixed media flower art project!
*This post contains referral links for recommended items; this means I could receive compensation if you take action through one of these links.
One flower at a time. I want to hear what it is saying. – Robert Francis, “Bouquets”
My kiddos and I came across this line recently while reading through National Geographic’s Book of Nature Poetry. While we’ve read that poem several times throughout the years, it reminded us of spring and all the beauty that is on display through a single flower’s bloom. That’s where today’s mixed media flower art comes into the picture.
Mixed Media Flower Art for Kids
Here are the supplies you’ll need to complete this flower art project with your kids.
Mixed Media Flower Art Supply List
- 8 x 10 canvas panel
- Acrylic craft paints
- Paint brushes or sponge brushes (one specifically for Mod Podge)
- Pencil
- 2 or 3 sheets of scrapbook paper
- Scissors
- Mod Podge
- Black art pen or Sharpie (optional
- White gel or paint pen (optional)
- Template and poem printout (optional)
 Once you gather the supplies needed for the project, consider the paint colors and scrapbook patterns you want to use. Also, if you opt to not use the template, choose a flower to use as inspiration for the project.
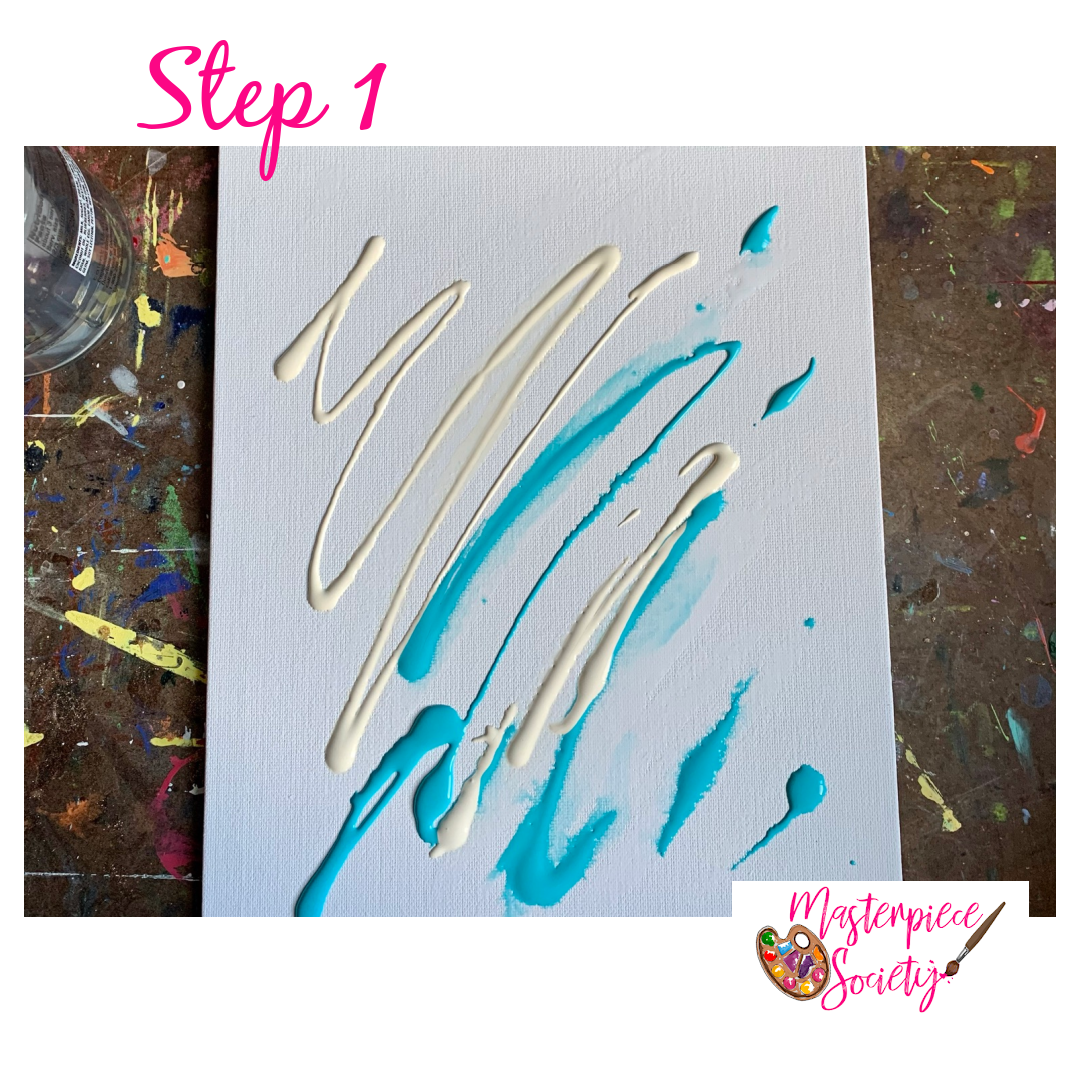
Step 1 – Paint Background
Begin painting the canvas once you determine a color scheme for your flower art. There’s plenty of room for creativity here, so feel free to use fun brush strokes and any special touches to make it your own.
You also want to check the canvas after a few minutes to see if any touch-ups or an extra coat of paint is needed before moving on to the next step.
 Step 2 – Prepare Cutouts
While waiting for the canvas to dry, shade the back side of the template with pencil. Then place the shaded side of your flower template on the back of a sheet of your scrapbook paper. Next, trace an outline of the vase. This will create a “print” of the vase on your scrapbook paper and make it easy to cut out.
Repeat this process for the flowers using one or two additional scrapbook paper patterns. (Note that we used two flower cutouts to create our bloom. That’s why two flowers are included on the template.) You can also do this for the stem and leaf unless you choose to paint them in like we did.
Keep in mind that you can skip the template and trace your own vase and flower onto the sheets. The important thing here is to draw the vase and flowers and cut them out.
Lastly, be sure to cut out the “Bouquet” strips from page 2 of the template if you want to add the poem to your canvas.
Step 3 – Add Cutouts
When the tracing and cutting are both out of the way, experiment with the cutout placement to be sure you have an idea of where you want everything to go. Next, pencil in the outline of the stem if you plan to paint it in.
 When you’re happy with the placement, simply “paint” the canvas with Mod Podge anywhere you plan to place a cutout. Then place the cutout on top of the Mod Podge and gently press it onto the canvas.
Step 4 – Add Accents
The last step of our mixed media flower art is to finish out the scene. Do this by painting the stem and center of the flower if you prefer not to use more scrapbook paper for those elements.
 You may also want to use one or two of the following accent ideas to break up the background color or draw attention to the different elements.
- With a pencil eraser and an accent color from your paint selections, gently stamp dots of paint onto the canvas. You can also achieve this accent using a q-tip.
- Fill in an empty spot by scrunching bubble wrap or a paper towel together and dipping it into a small amount of paint. Then use it to dab little paint splotches in the blank areas of the canvas. (If you get carried away with this accent, you can remove some of the accent paint by dabbing over it with a clean paper towel before it dries. Dabs of the original paint color can also be added to cover accidents if needed.)
- Use a black art pen or Sharpie to outline the cutouts. Outline the quote the same way and add any additional accents you wish. You can use a white paint or gel pen instead of the Sharpie or in addition to the Sharpie for additional accents.
When the accents and outlines are finished, carefully paint a layer of Mod Podge over the entire canvas to seal the completed project. Once that layer dries, your mixed media flower art is ready to display and enjoy!
Don’t forget to share your lovely flower art with us. Be sure to use #masterpiecesociety or tag us on social media so we can see your work and celebrate spring with you!

Looking for more spring-themed art inspiration to enjoy with your kids? Be sure to check out our Watercolor Whimsies course and our Springtime Splendor Mixed Media Workshop. Both of these are a great way to celebrate the beauty of spring with your artists all season long!
